

Steps in Building a SCAMP sailboat
Links to all my scamp building pages.
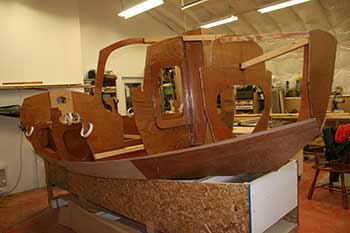
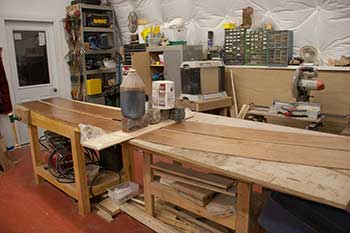
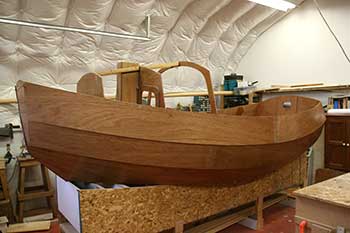
SCAMP gets side planks
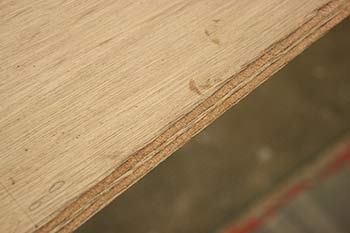
The Scamp has 3 sets of planks. Each is made from 6mm ply joined. The 2 bottom planks have bevels to accommodate the plank above it.
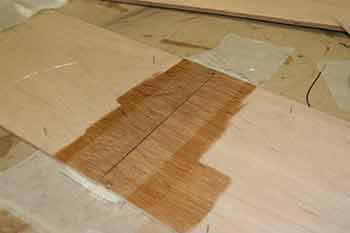
Joining Planks
I used Dynamite Payson's method of joining the planks. He suggested butting the 2 sides, sanding to remove some thickness and using fiberglass to glue the 2 sides of the plywood. I tested this method and compared it to both making a scarf joint, and to making finger joints. The resulting joint is stronger than the plywood. It changes the flexibility of the ply a little but for a shallow bend it has no real impact. Simple, easy and strong, what's not to like. Here is my page on joining, it has more details on all the methods.
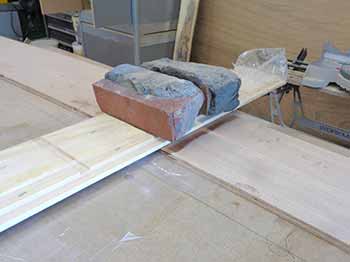
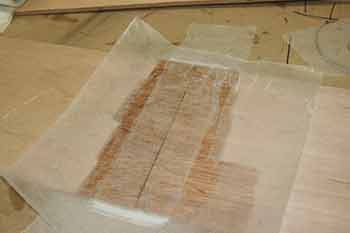
I joined the 2 planks together in a pile. I have waxed paper between them. The extra fiberglass is easy to cut off while the resin is still slightly soft.
Checking the fit
When I made the base of the boat and installed the stem onto the bottom panel I noticed a slight difference in the curve of the frame from the bottom curve of the stem. I did some adjustment and mostly removed the extra curviness. I then checked the fit of the first plank by making a cardboard plank and trying it on for fit. It went on with no problems. I have more details of the front assembly and checking here. I used cardboard because the real planks are stiff and not easy to just casually stick on to check the fit.
Having a kit would certainly have been much faster, perfect frame, perfect finger joints, no human error is cutting. I sort of like the challenge though.
Beveling the Planks
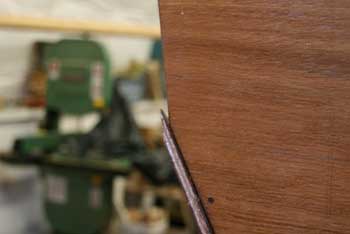
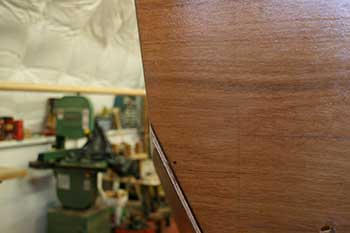
The plans give the dimensions and position of the bevel. It ranges from about 23 mm to 8mm depending on the position. The bevels are on the top edge of the planks and allow the next plank to fit nicely over the bottom plank. This overlap gives a good gluing surface and allow for a much nicer fit.
First step in making the bevels is to very carefully mark the location. Plans are clear but it takes a bit of time. The measurements are for every 30 cm. I put little nails in the spots and used my bendy piece of wood to get the proverbial fair curve. I marked it in dark pencil along with all the area that needs to be cut off.
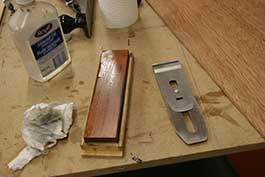
I was quite worried about this step. I decided to use the bench plane but I could have used the belt sander.
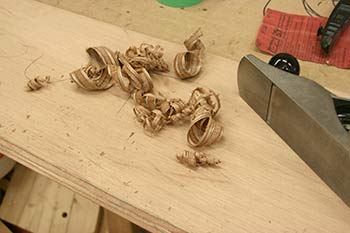
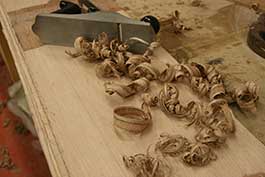
I had sharpened my planes and this paid off. The bevel turned out to be quite easy to cut. I'm very proud of the nice plywood curls of wood that were coming off.
It took less time to carefully cut the bevels than to mark them. The wood grain makes the line look crooked but it's even. Really. The lines of the plywood helped me see how the cuts were going and the very bottom ply gave a nice line that told me when I had reached the lower surface.
The plywood and glue is hard on the plane and I touched up the edge between planks. This kept my plane really sharp. This ply is very brittle and tears out easily if the blades are not sharp. I had a bit of tear out at the very end of the plank but not enough to cause any damage. My hand also wobbled so the bevel is a bit off but I expect that will fill easily.
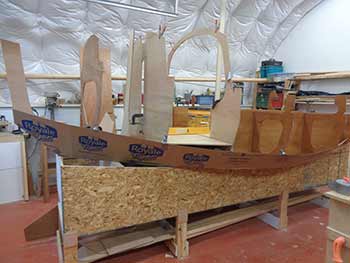
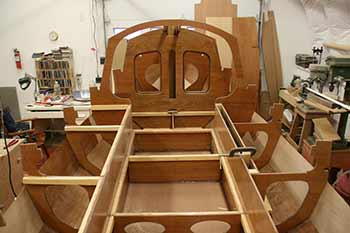
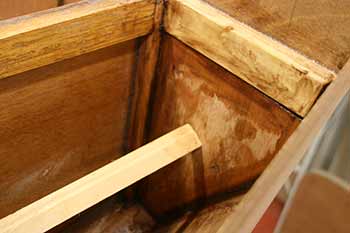
I made the various supports and the filling hole of the compartments under the cockpit sole. The side planks makes it harder to reach the bottom so it's better to do all this now. I have to be patient, not my strength.
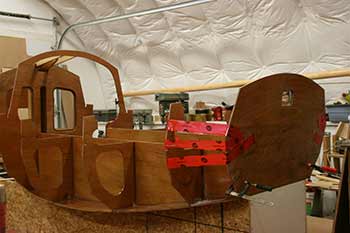
I glued on the transom. The tape worked well but left some goo on the wood when I took it off. It was annoying glue and hard to remove.
In the meantime I taped the inside of the water tank and added some ply to the bottom to make the drain hole level with the floor. These were suggestions by John Welsford and Howard Rice.
Installing the first Planks
I should really work some more on finishing the interior but I can't stand it anymore. I'm going to install the first planks! And pay for it later.
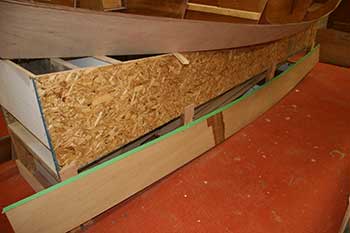
I tied the planks to the side so they would be supported and tried to fit them on. I realized that unless I beveled at least the back 2/3 of the boat bottom the planks would not fit very well. I used a combination of plane and sander with coarse paper to bevel the bottom. This improved the fit a lot and I was able to roughtly place the planks and check the fit on both sides.
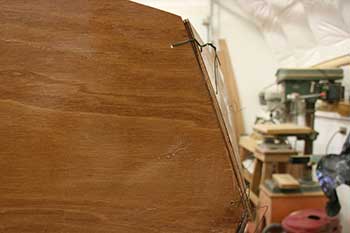
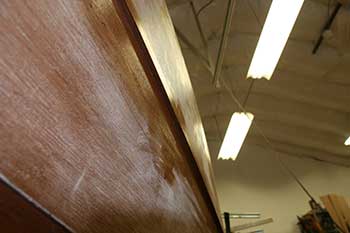
The green tape protects the bevel on the top of the plank. It is quite thin on the edge.
The build manual instructs to fit the back first and go forward. I did the opposite mostly because I'm working alone and it was easier to handle this way.
Fitting the plank was easier than I though it would be. I first put a wire stitch in the front and a couple along the side to roughly position the plank and make sure the back would fit. It took quite a lot of time to tweak the plank so that it lay smoothly along the bottom and the bulkheads but it was not difficult. At the back I put a wire stitch. All these wire stitches are quite loose and the plank is not in final position yet.
I repeated the process for the other side. I now had 2 planks roughly wired in but not in perfect position.
I went back to the front and added some more stitches to both sides till the front fit well. Pushing the front in position was the hardest part. There is just a hint of a compound curve that requires a bit of pushing and pulling. Eventually I had the front evenly tied and lined up.
The next step was to make my way to the back and gradually tighten the stitches I had placed and fine tuned the position of the planks. I aligned the bevels so that the next planks would fit smoothly on.
I already had one stitch in place that needed some tightening to finalize the position. I added a couple more stitches along the bottom of the boat and the plank. The stitches are not under very much tension since the plank actually fits quite nicely onto the bulkheads and the bottom. The front is the only place that is quite tight. I left the bottom part of the joint a bit loose for now because I will be putting glue in there. I tightened after gluing.

The plank curves smoothly along the side. The planks need checking so that 2 sides are as symmetrical as possible and there are no areas that have been pulled in to make an irregular spot. After a day of installing I'm tired and prefer to wait for rested fresh eyes before glueing.
It took me most of the day to place the 2 bottom planks and wire them. I was working quite slowly.
I'm ready to tack the planks in place but I'll wait. I'm too tired and I'm stupid when I'm tired.
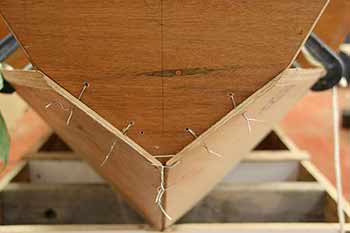
After checking for symmetry as best I could. I went around the wires and tacked the plank to the bottom and to the bulkheads.
The next day I snipped off the wires except for the very front and the back and tacked the plank to the bottom and to the bulkheads.
I cut my fiberglass fabric into strips rather than buy the tape. It was quite expensive to buy and deliver here so I'm living with the the little fiberglass hairs.
Using a foam roller works best and doesn't pull the hairs out. It helps to have clean gloves that are not too sticky.
Plank number 2
I dug up the second plank and lined it up. I used a string on the drafting line. Once I had a good position I temporarily nailed them to the bench and sanded a slight depression at the seam. This compensates for the thickness of the fiberglass patch.
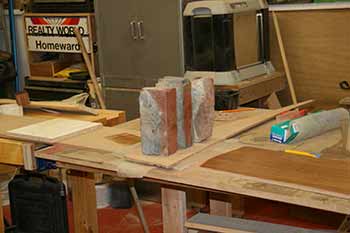
Wax paper works well to keep the seam from sticking to the plywood I used under the weights. I did not try to glue the 2 sides OR the 2 planks. Next day I placed the second plank on top and lined it up exactly and joined it. That way I'm sure that my second plank is exactly the same as the first side.
I don't have the advantage of kit people who don't have to worry about lining up the pieces. The puzzle joints are very good for lining up the boards.
I also went around and put a second coat of epoxy onto the taped seams on plank 1.
After glueing the pieces of plank 2 I marked the bevel location. I used my batten and small nails to get a fair curve.
After sharpening the plane I was ready to cut. I've been using mineral oil and it seems to be working really well. I use several methods of sharpening but find that for a quick edge the oilstones work well. I can't seem to do that with the chisels so with them I use a honing guide.
Again it took less time to cut the bevels than to prepare to do the cut. I'm very pleased with these plywood shavings.
I taped the edge so it would not get banged up and laid the planks beside the boat ready to be fitted on.
Plank 2 is ready to go on the boat but I'm waiting till I'm rested and plan to spend most of the day making sure the second plank goes on right.
It took all afternoon to place and fit the second plank. I had to cut slight bevels on the back bulkhead so the plank would fit better, but since it was the same on both sides I did not worry. I would worry if they were not symmetrical.
No big gaps or odd angles so I guess it fits OK. Like Cookie Monster said, "not bad but not terrific" when asked about a cookie.
The front view shows that the top of the 2nd planks are just a bit high. They fit very well on the bottom. I extended the same bevel on the first plank that is cut on the front piece. This looks odd but will be trimmed off. The planks extend about a quarter inch beyond the front. I guess I will have to trim both pieces when I install the last plank. I'm not sure why the front of the planks are too wide. It's only about 3/16 of an inch at the most so it will work.
Other than that the 2nd plank sits very nicely on the first.
As in the first plank there was no difficulty in installing the plank. I made a few temporary stitches and went from back to front fine tuning the fit.
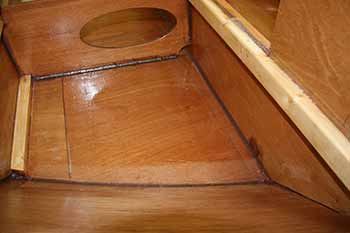
Tacked everything down after checking and left it overnight. Then took out the wires except at the front and back and started making fillets.
I had put off cleaning up inside the bow compartment so I got to it, did a bit of sanding while it's still easy to reach and cleaned up a few fillets. I still have to tape the second strake in place.
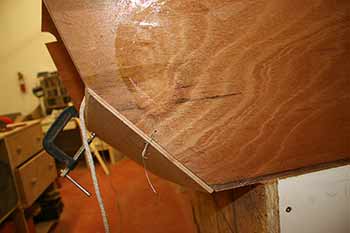
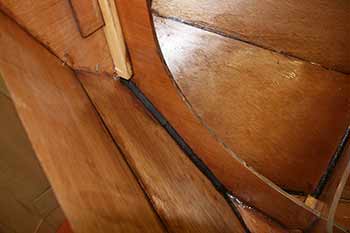
At the transom, I added some doublers on the port side to help support any future motor mount. I have not decided what I will use but while the compartment is open it's easy to add. I had also put some tape between the planks and the transom before the doubler.
While I was in an epoxy mood, I glued in some of the seat supports on the starboard side.
The current batch of wood flour is very dark and shows up very well even after I've cleaned up the seams. It won't matter after sanding/painting.
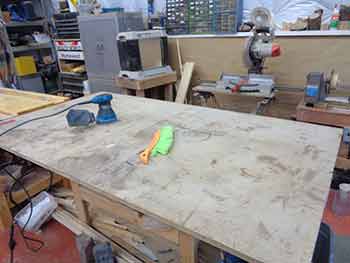
One of my table had become quite bumpy from epoxy drips so I spent some time chiseling off lumps and sanding the table smooth. I did not want to mark the parts I would be working on.
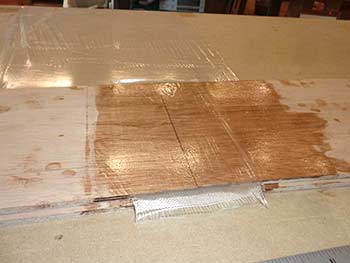
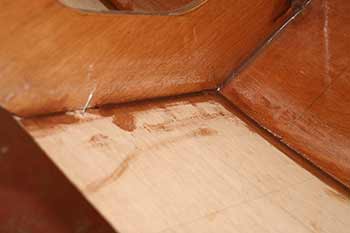
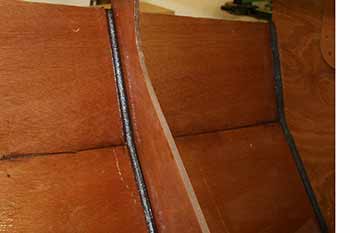
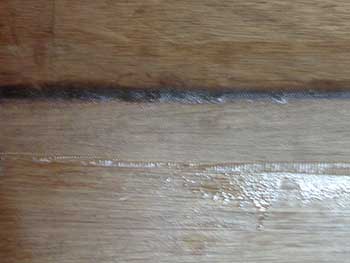
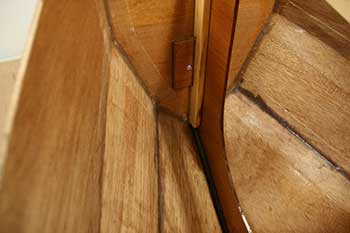
After making some shallow fillets, I taped the seams between plank 1 and 2. Not complicated but it takes some time to get it nice and even and smooth. The light is not good and the tape looks poorly saturated but it is actually fully wetted. I'm glad that's done. It's not my favourite job.
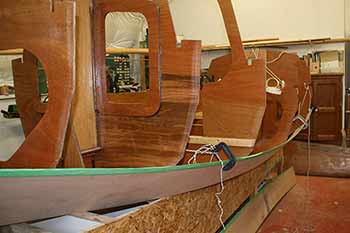
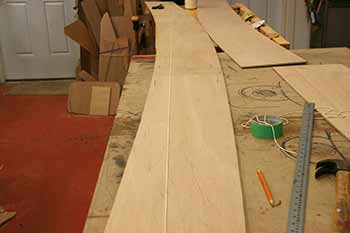
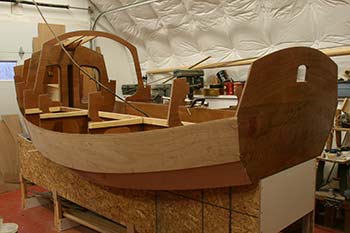
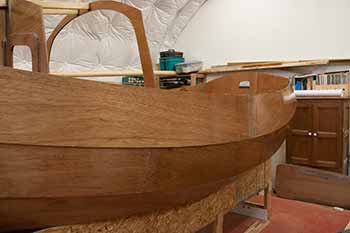
The Sheer plank goes on.
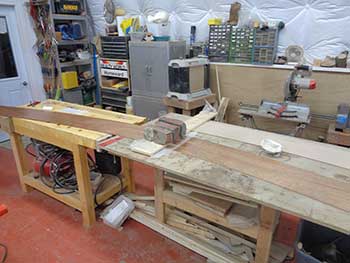
While waiting for the shop to warm up, I dug up the third planks and checked them for fit, and lined one set up to glue. I do them separately because it's easier to line them up that way. One set has good markings made when I drew the parts from the measurements but the second set has no markings at all since I marked them from the first set.
Glassed the joint as soon as the room was warm enough and put waxed paper and weights.
I'll join the second plank by placing it on top of the first and matching it perfectly. That results in identical planks. This is not a problem kit builders have but for plan builders even a small difference can make it difficult to adjust the strakes.
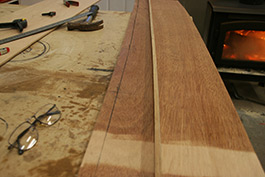
Since these are the sheer planks there is no other to fit to them so there is no bevel to cut. I expect I will have to adjust the top line but that should be simple.
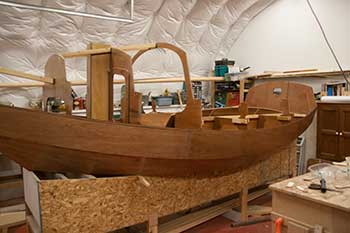
The third planks are joined and covered in epoxy. The boat is now ready to get its third plank.
I'm also having to make some decisions about hatches, motor and wiring and various other bits of hardware.
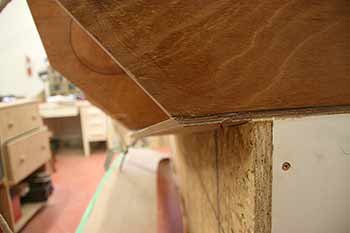
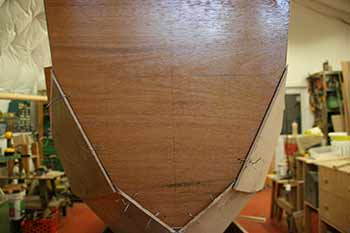
After trying on the top planks I ran into a problem at the bow. I was half expecting to have to trim the top of plank 2 because it extended beyond the bow angle. It was simple using my super sharp plane and a file to modify the second plank for about 2 feet. This did not detract from the sweep of the strakes and the third plank now fits much better.
Once I had the front trimmed the plank went on quite nicely. It is exactly the right length, or maybe 1 mm. short but that will be fixed once I round over the ends in order to fiberglass the corner. A couple of the bulkheads are just a little proud of the strake edge and a couple are just a bit shy. Luckily they are the same on both sides so whatever happened is symmetrical and I can live with that.
I'll trim or fill depending on how the side deck fits. It's only a few mm anyway.
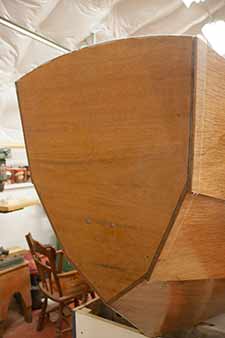
Here is the transom and the bow. The fit of the trird plans is acceptable. At the bow the plank is just a touch too wide but I'll wait till other pieces are ready to go on before trimming anything. It's safer that way.
It has taken me most of the day to fit this set of planks. I'm tired and will take a fresh look at the fit tomorrow. If all is good, I can tack the plank in place. It is only wired on now.
After tacking with epoxy glue and tightening the wires I let it set and the next day completed the gluing. Next came the glassing of the seam and the making of the fillets. This is just about completed.
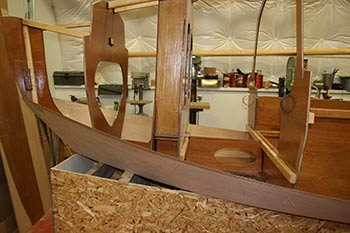
I've started working on the front compartments. Finishing off the resin coating and sanding. I think there is a limit on how much sanding and finishing I will do in the front. It will not be seen and cannot really be accessed. Once the structural requirements have been done and a minimum of sanding, I think I will go on to other bits. It's not in bad shape anyway. I think that as long as it feel smooth to the touch and does not have bits to scratch the hands or catch on to whatever gets stored there, I'm happy.
I've been going around and making sure the plank seams on the outside are well filled with glue. I had glued them when I installed the planks, and had removed any squeeze out, but I had a few spots that did not have a lot of glue. I'm using a spatula and forcing a quite wet glue mixture in. It's not taking much but enough to show me I need to do this.
When I turn the boat over, I will go over the joints again and put a small fillet so there is a very small radius between the planks.

I spent a day sanding the inside and outside of the hull planks. This included rounding the corners of the bow. I'm planning to glass this soon so I can install the towing/anchoring ring. Once the deck is on it's near impossible to reach the front. Maybe if I was a smaller very bendy person I might be able to but I'm not. Any fastener needs to be in place before I close the front.
At this point the outside and inside of the hull planks have at least 2 coats of epoxy, and the fiberglass tape that connects the strakes and the bottom is filled.
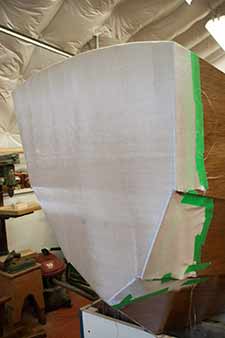
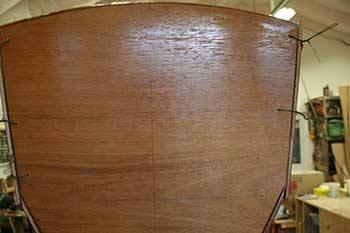
It took a bit of time to set up the glass and tape it so I could do a tidy job of the glassing. The rounded corner is not a huge radius but enough to allow the glass to come around to the side. I used painter's tape to tighten the cloth over the front and side.
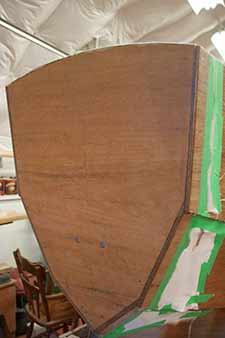
I used a spreader to put a coat of resin on the glass and let it sit for a couple of hours. On the second image, the tape I put under the glass to give me a tidy margin is visible. The resin was at the jelly stage and I was able to cut the glass along the tape and remove the extra glass. I pressed down any glass that had been raised along the cut but it was quite tidy already.
emails: Christine
If you decide to build a boat be careful. These tools can be dangerous. If you don't know how to safely handle something find out. There are lots of forums out there.
This web site reflects my personal ideas and doesn't represent anyone else's point of view. I don't claim to be an expert in anything, just some little old lady muddling along.
