
MakingPuddle Duck Racer
Here are links to other steps of the Puddle Duck Build
- Part One, What's a Puddle Duck? and I get Started
- My Puddle Duck Racer goes 3D It's official, I get my hull number.
- Next, I add flotation compartment.
- Bottom gets fiberglassed and Gunnels are added.
- Daggerboard case and seat get made.
- Making the daggerboard.
- Adding weight to the daggerboard
- Making the kick up rudder along with a tiller.
- I made a wooden sprit
- Finishing the carbon fibre mast I made a few years ago.
- Replaced the Broken Carbon Fibre mast with a wooden one.
- My PDR gets a mast step, plus side and front decks and more glass
- Finally Finishing the hull
- The Duck gets some hardware
- I make a Sail for the Puddle Duck
- My Puddle Duck Gets Launched!!
Kwacker Jack, my Puddle Duck Racer, gets some Hardware
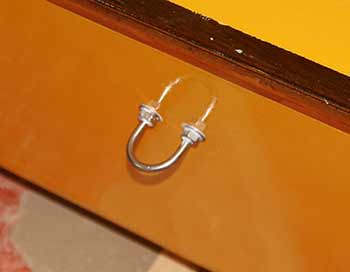
The boat is painted as well as it's going to get and I now need to add finishing touches. I have a ring for the front painter, some hatches, various rigging bits and rudder hardware.
The Stainless steel bow eye went on. I had glued a plywood backing plate on the inside to give a strong attachment point. I could tow the boat from this point.
I think eyes are prettier but I had this so on it went.
I'm using 3M 4200 somewhat removable bedding compound to waterproof and help bed the hardware.
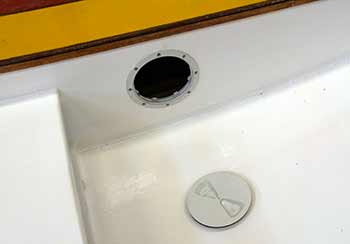
I next attached the hatches and cover onto the waterproof chambers. These are 6 inches wide. In my Skerry I had only 5 inches and found that it was tricky to put anything in there. The camera in particular did not fit very well.
There is lots of little nuts and bolts plus a good layer of bedding compound. I find that the cover seems to stick if I tighten it. I'll try putting some silicone on the threads. I can't put grease because it damages plastic.
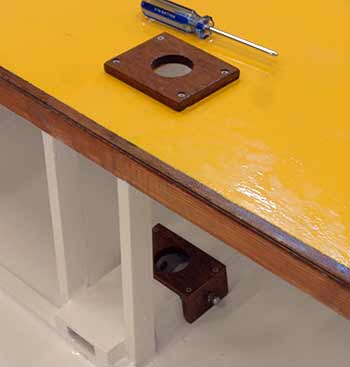
I bolted on the mast step. It can be taken off easily if I want to modify the angle of the mast. It started as Michael Storer's design but got modified beyond recognition. The partner is screwed on with bedding compound.
I had bought Michael Storer's plans for a then Puddle duck. It then become an OZ racer. Pretty much the same boat except for a slight difference in the bottom of the hull. Mine is a puddle duck hull shape but a lot of the design elements came from Michael Storer's excellent plans.
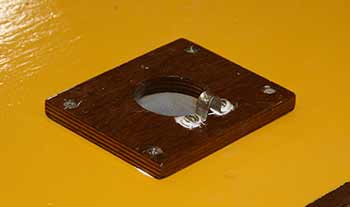
Downhaul attachment is added to the mast partner. It is bolted through so it does not tear out.
I'm planning to put a triangular sprit, also known as leg of mutton sprit. I've always wanted to try it out so here's my chance.
NOTE: I placed the attachment too close to the hole and when I came to use it it was difficult to slip my hand between the mast and the metal. I attached a little cleat to the loop and attached to that but that was a mistake.

On the back port and starboard I bolted 2 eyes. These will have a line that will hold a small block for a traveler connected to the back of the sprit and sail.
I'm also hoping that I can also use these attachment points for bumpers or for a tiller tamer if I need to.
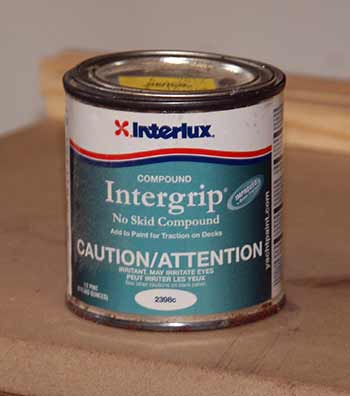
This is the non skid compound I'm using. The paint is very smooth ... well smooth-ish, and slippery so I've added some of this to the paint.
I'll also put some on the yellow deck wher I plan to sit sometimes. I had used it for the Skerry bottom and it is very good at making things less slippery.
It is a bit expensive but a small amount goes a long way so I guess per time is is not so expensive. I think I would just mix a bit of sand on the paint if I did not have this.
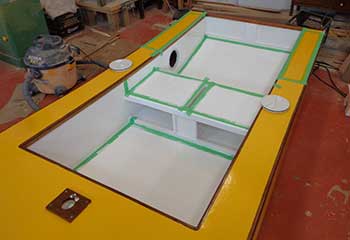
After marking off the spots I wanted to be non skid, I painted a thin coat of paint with the non skid powder added. It actually makes quite a sandpaper finish. Great for the floor but maybe too much for the seat. I'll sand down and re paint if it's too abrasive.
I need to put oar hardware but my local store was fresh out so that will wait.
Since I've not finished the rudder assembly I will wait to install the gudgeons.
emails: Christine
This web site reflects my personal ideas and doesn't represent anyone else's point of view.
Plans for Puddle Duck Free
Puddle Duck Racer Class Rules Not many really, the bottom 10 inches of the hull has to conform to form. After that have fun.
Puddle Duck Racer Wikipedia entry
Michael Storer Oz Version Nicely detailed build photos for his version (slightly different and not class approved but perfectly good) of the Puddle Duck. His plans include a particularly successful daggerboard/rudder shape. He also has a number of really nice video of Ducks sailing.
Polysail has a nice very detailed instruction page for making puddle ducks. They also supply polytarps and kits for making PDR sails.
My Boat Page
Ultra Simple Boat Building
Devlin's Boatbuilding
Dynamite Payson, Build the New Instant Boats
Fiberglass tape over seams only, is often used instead of full glass covering, to save weight.
There are many suppliers of epoxy resin
Cloth